ok – so I decided to set up my own WordPress blog on an Amazon EC2 Linux instance.
As you may already know, you can use AWS CloudFormation to deploy a ready made WordPress blog AMI image but I wanted to find out what was going on under the hood. So here are the steps I took.
The instructions in this blog post only apply to the Amazon Linux AMI. Different steps may be needed if you choose another Linux AMI. Also, phpMyAdmin is used to create the database in this blog.
Launch an EC2 instance
First up, launch an EC2 instance. I chose the classic wizard to launch my instance.
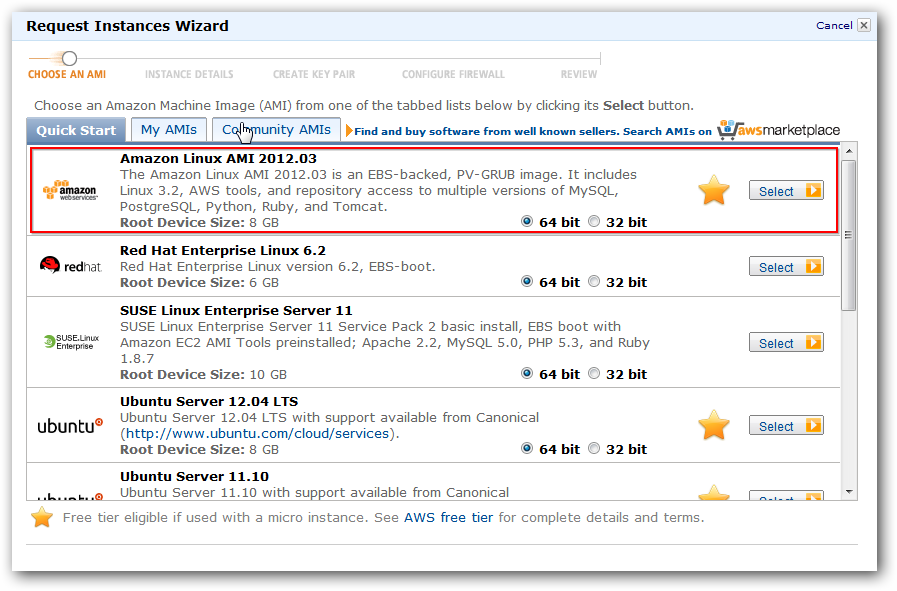
Next, select the AMI. I chose the 64 bit Amazon Linux AMI. The instructions in this blog only apply to this AMI. So proceed with care if you choose another AMI.
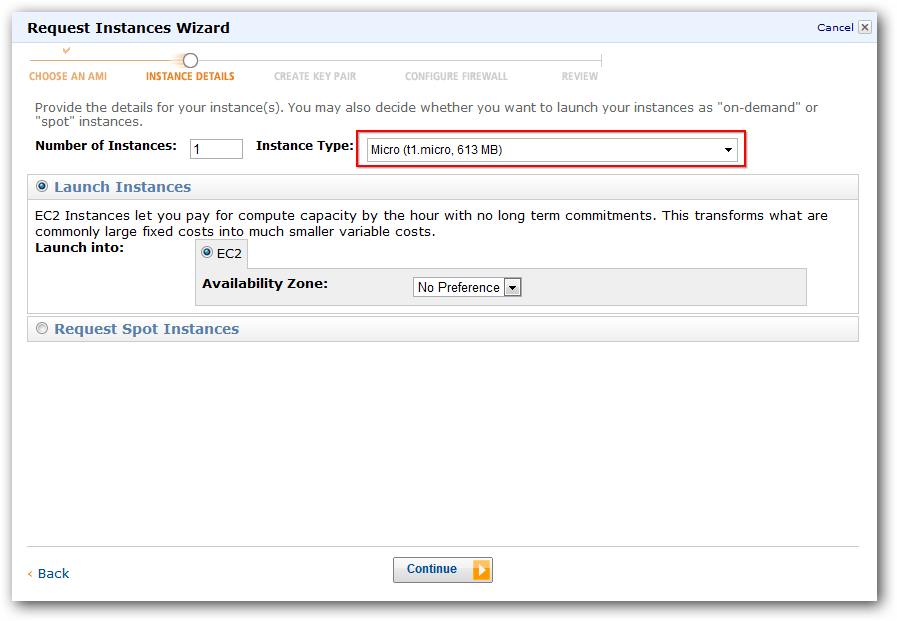
Next up, select your instance size. I chose the micro instance. If your blog has a high throughput of traffic, you may want to choose a larger instance.
Accept the defaults on the Instance Details page.
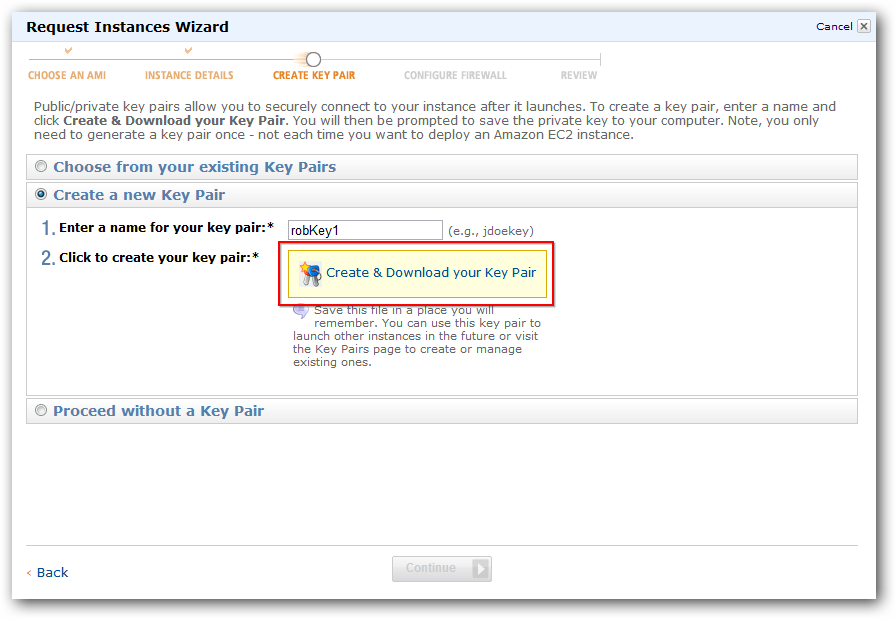
On the Create Key Pair page, create a key pair and download the pem file to your computer.
On the Configure Firewall page, select the Quick Start security group. At this point, you are ready to launch your instance.
After a few minutes your server instance will be created and we are now ready to SSH into it to install WordPress.
SSH into your instance
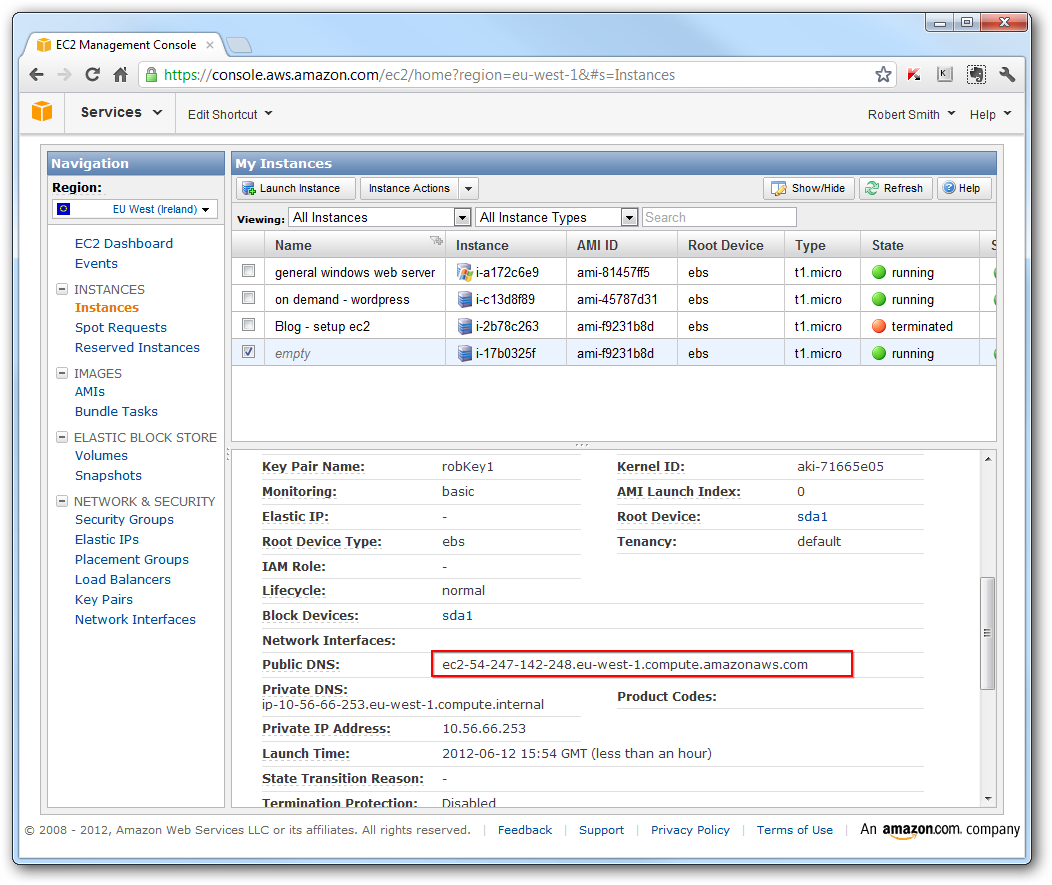
To SSH into our instance, we need the public DNS address of it. So select the server instance we have just created to show the details and then select the public DNS as shown below.
This demo is done from a Windows PC, so we are going to use PuTTY to SSH into our instance. We also need PuTTYgen to convert the Amazon .pem format into the putty .ppk format. To install PuTTY and PuTTYgen go to http://www.chiark.greenend.org.uk/~sgtatham/putty/
Start PuTTYgen and select Load. Browse to the location of the .pem key file you created above ( called robKey1 in my case )
After you have loaded your .pem file, PuTTYgen displays the screen below. Click on Save Private Key as shown.
Click Yes when PuTTYgen asks if you are sure you want to save the key without a passphrase.
We are finished with PuTTYgen so close it down.
Now open PuTTY to connect to our instance and enter the Public DNS address from our instance selected a few steps back as the host name.
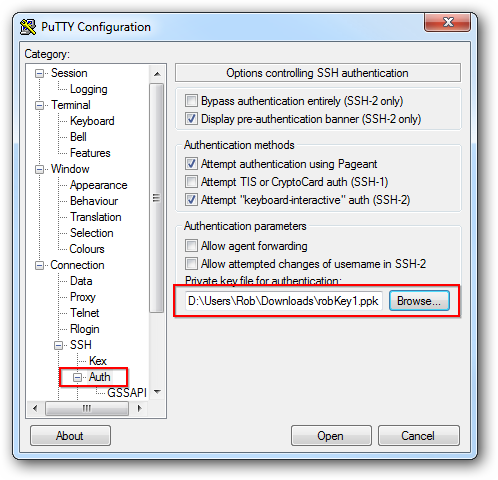
Then navigate to Connection->SSH->Auth and browse to your key file.
Select the Open button. If all is well, you should get a Login prompt. Login as ec2-user.
Install Apache web server, PHP and MySql
sudo -i

yum -y install httpd

yum -y install php mysql

yum -y install mysql-server
Start the services
service httpd start

service mysqld start
Install phpMyAdmin
wget http://packages.sw.be/rpmforge-release/rpmforge-release-0.3.6-1.el5.rf.i386.rpm

rpm -Uvh rpmforge-release-0.3.6-1.el5.rf.i386.rpm

yum -y install phpmyadmin

/usr/bin/mysqladmin -u root password ‘yourchosenpassword’
Alter the phpMyAdmin config file
Use your favourite editor (I used vi). To insert text hit the i key. When done inserting text hit the ESC key. To save and quite type 😡
vi /etc/httpd/conf.d/phpmyadmin.conf
Alter the contents of the file to the following:
Alter the phpMyAdmin config file
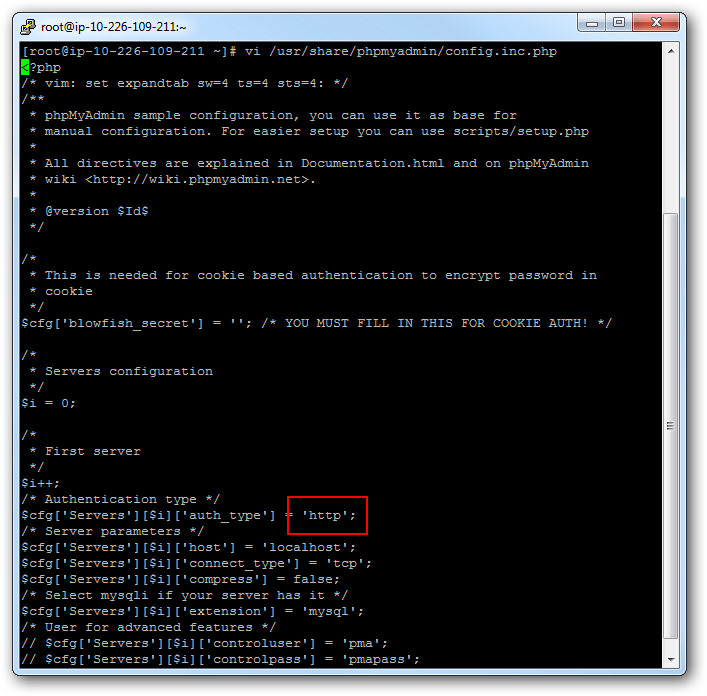
Alter the phpMyAdmin config file. Remember, with vi to insert text hit the i key. When done inserting text hit the ESC key. To save and quite type 😡
vi /usr/share/phpmyadmin/config.inc.php
Change the authentication type to http as shown in the screen shot above.
Restart the services
service httpd restart

service mysqld restart
Test the services
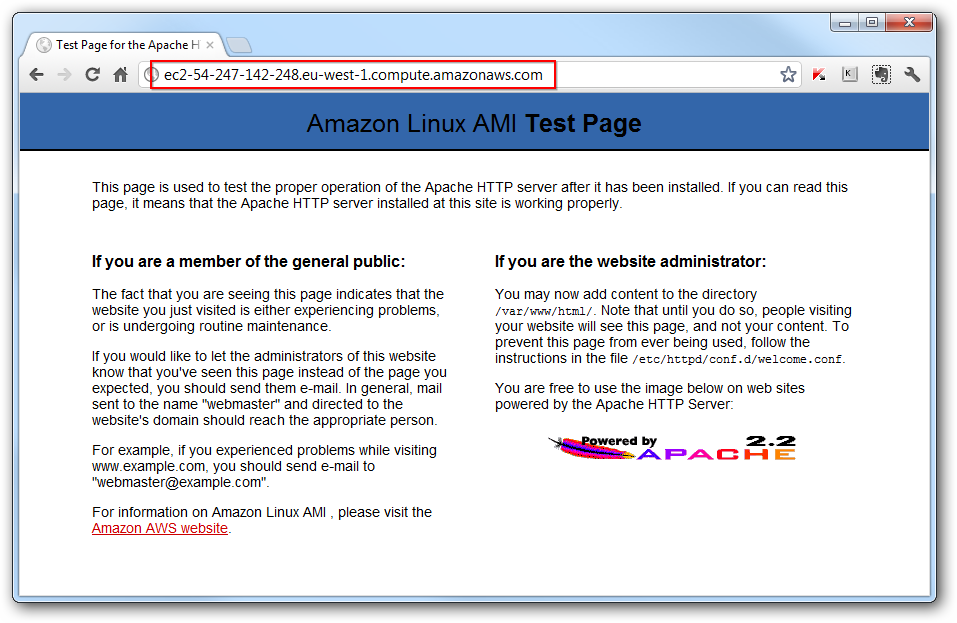
In a web browser navigate to your public DNS address and if the web server is operating correctly you should see something similar to the screenshot below.
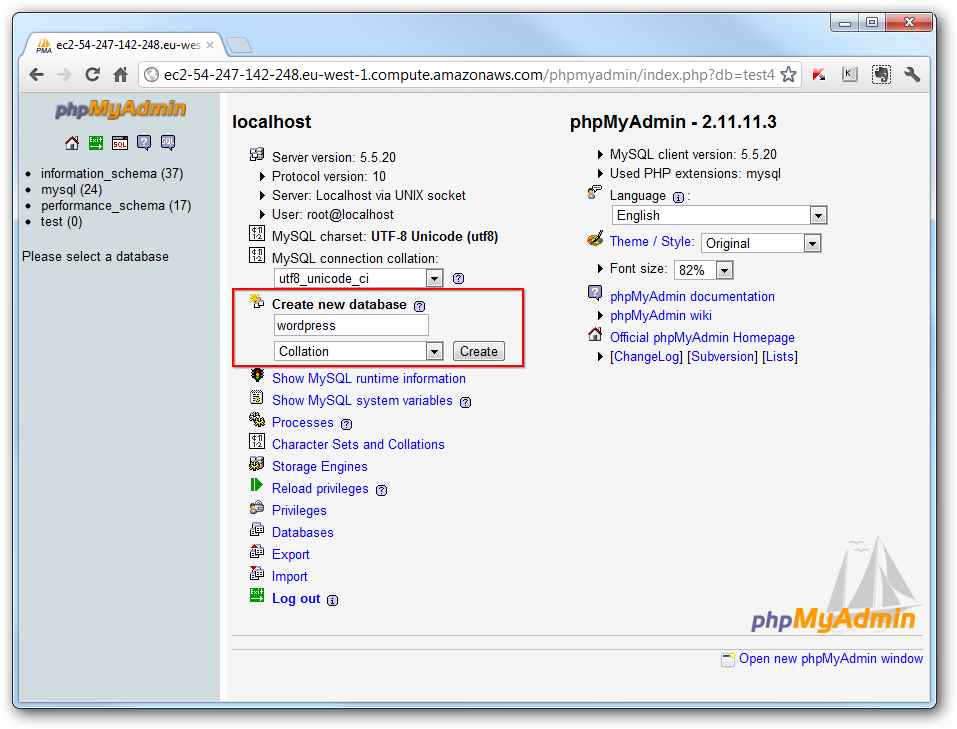
Add /phpmyadmin to the end of the browser address and you should see the phpMyAdmin start page. Login using root and ‘your chosen password’ selected above.
Now create a new database called wordpress.
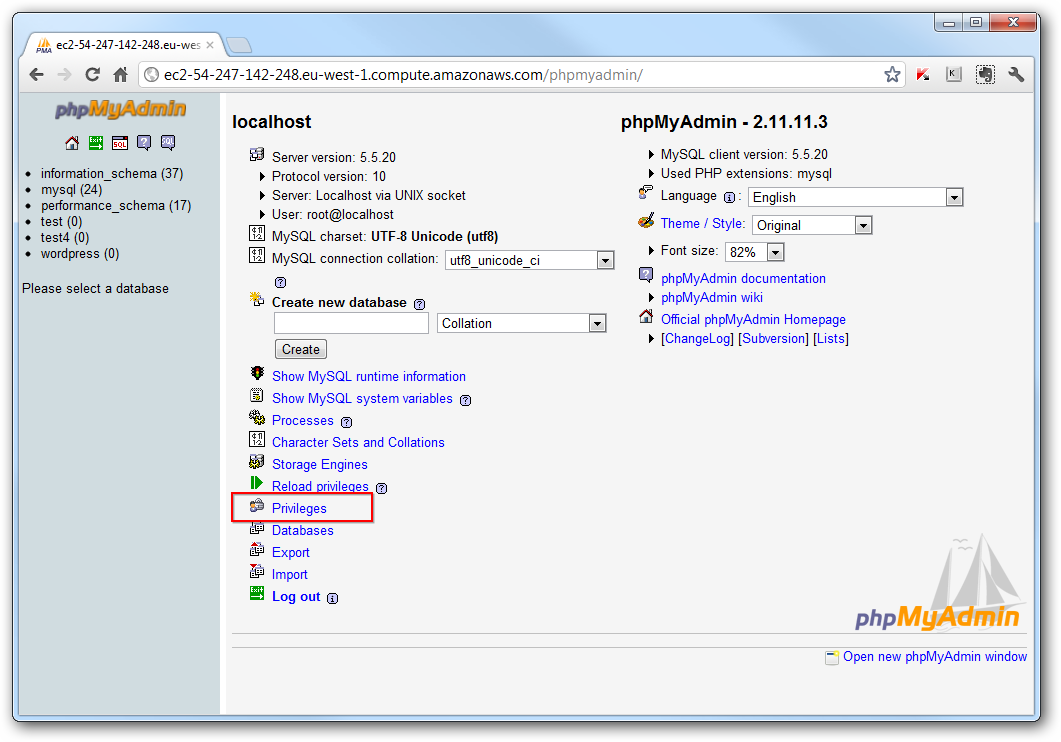
Go back to the phpMyAdmin home page by clicking on the logo in the top left hand corner then select Privileges.
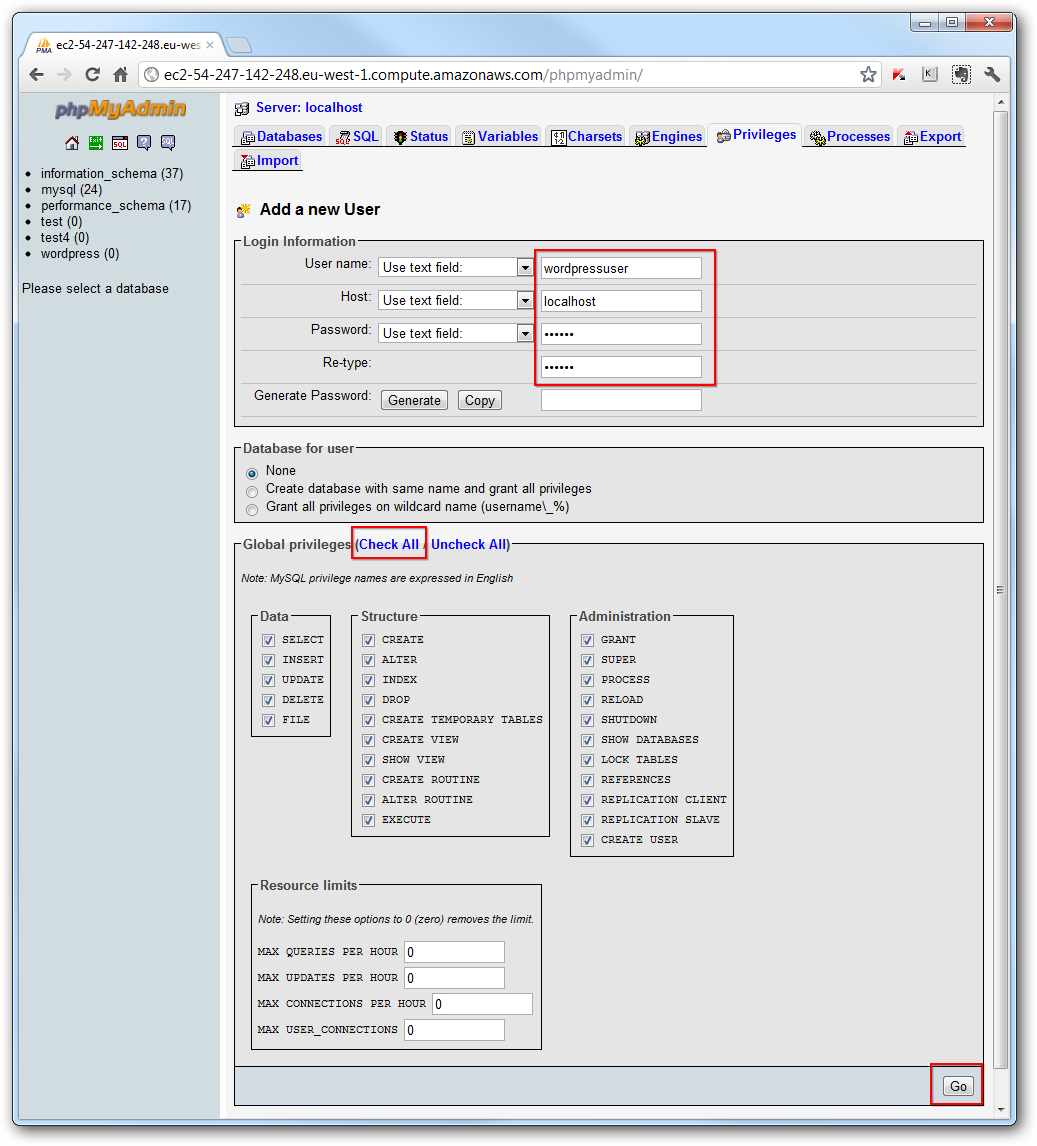
Once on the privileges page, select Add a new user. Enter a user called wordpressuser and enter a password. For the host, enter localhost . Also click the check all box as shown below. Press Go.
Install WordPress
wget http://wordpress.org/latest.tar.gz

tar -xzvf  latest.tar.gz -C /var/www/html/

cp /var/www/html/wordpress/wp-config-sample.php /var/www/html/wordpress/wp-config.php

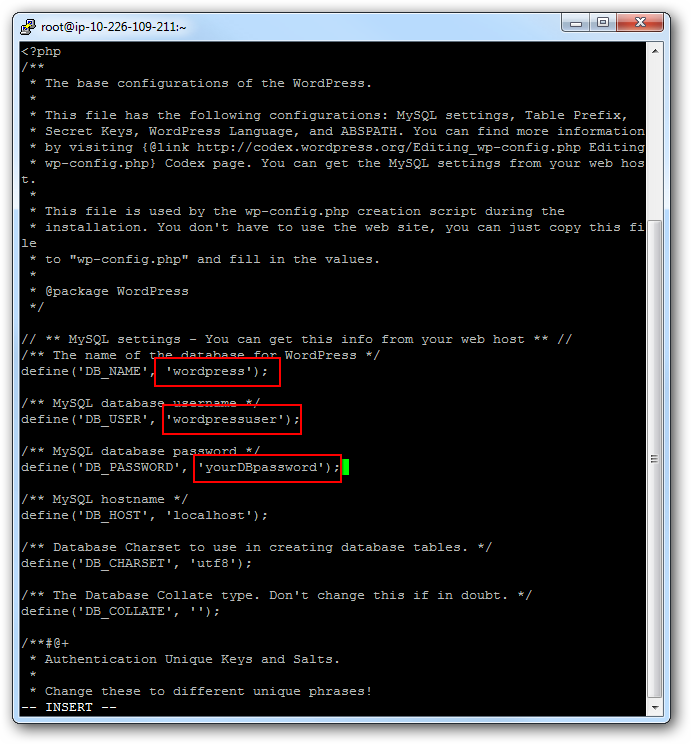
vi /var/www/html/wordpress/wp-config.php
Modify the database connection parameters as follows:
All Done
In theory, thats it. Just go to your wordpress blog to test it. You should see the wordpress installation screen.
From here you can just set up WordPress by choosing a site title and selecting a username and password. Hit the Install WordPress button and you should have a wordpress blog.


